Well I like a challenge. I like to see if homemade things are genuinely nicer/better than the bought version (this usually seems to be the case.
I first made crumpets last year. They were an unprecedented disaster. I swore never to make them again... then I bought some crumpet rings and put them in a drawer had a baby and forgot all about them.
Yesterday a friend started a conversation on Facebook about making crumpets, and it seemed that I was not alone in disasterous crumpet making attempts!
However this link was shared http://www.theguardian.com/lifeandstyle/wordofmouth/2013/mar/21/how-to-cook-perfect-crumpets
I had a bit of time today so I thought I would see what I could achieve.
I won't repost the recipe as I followed the directions to a tee but I'll show you my progress and result!
There's a lot of WAITING!
First you mix sugar & yeast into wet ingredients and wait 15mins.
Then you mix that with the two flours and wait 1.5-2hrs - I was pleased with my light frothy batter.
Then you mix bicarb into the batter and wait another 30mins.
So before you start cooking you've spent at least 2hrs15 waiting! Good job I have Baby B and a house full of jobs to keep me busy!
I knew previously I had cooked them too hot. So I heeded the "medium-low" heat advice. As I only had two crumpet rings I could only start two at once...
They bubbled enthusiastically.
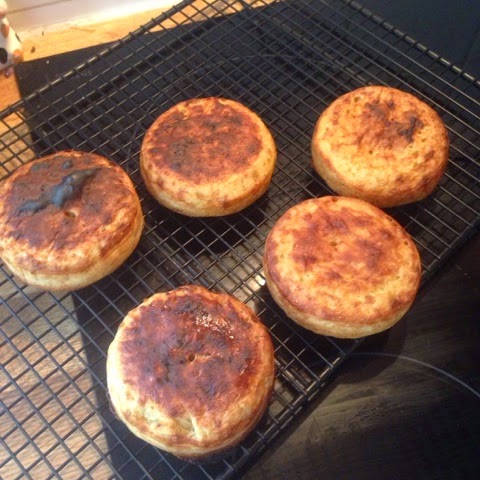
The instructions say to grill them under a hot grill if you want to eat them straight away. They looked like crumpets but a bit blond before they went under the grill.
I played around with this doing one or two at a time, but kept slightly burning them... I was a little sad that I didn't acheive the characteristic bubbled top surface but still they looked good.
The last two I decided to leave in the rings in the pan whilst I grilled to see if that made a difference. It did. They "domed" ever so slightly which was pleasing to the eye.
However the proof of the crumpet is in the buttering...
We all loved them. Stephen and I thought they tasted better than any shop bought equivalent. The texture was light and fluffy and all eight vanished in minutes.
So our verdict is:
Definitely worth making. Yummy. Fluffy and quite a fun thing to do inbetween other chores. I'm now wondering if I could freeze them at the "pre-grilled" stage. I've also ordered another two crumpet rings (sold as poached egg rings).
Do not use olive oil to fry, it makes them too crispy
Leaving longer in the flour & yeast phase works well (added yeast mix to flour at 10am, returned to it at 3pm).
For a more authentic look let the tops dry out whilst they cook from the bottom then cool. Slice thin layer of top of crumpet to expose holes then toast in toaster.


No comments:
Post a Comment